Setting up a dance practice space on hard floors is relatively easy, but what if all of your space is carpet? I did my fair share of dancing on carpet when I was taking virtual classes during the Covid-19 pandemic, and I know it’s no fun. So, how do you set up a dance floor on carpet? In Summer 2021, I set out to discover just that. Now it’s time to share what I learned!
You’ll probably want to know, this did not mess up the carpet in my apartment at all, and I did get my whole security deposit back when I moved out!
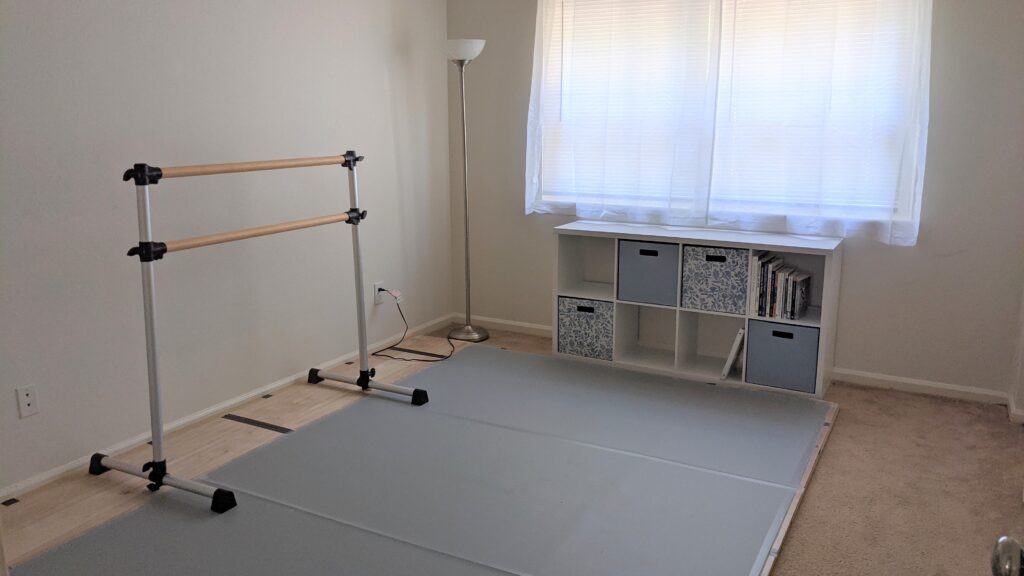
Before: An Empty Bedroom
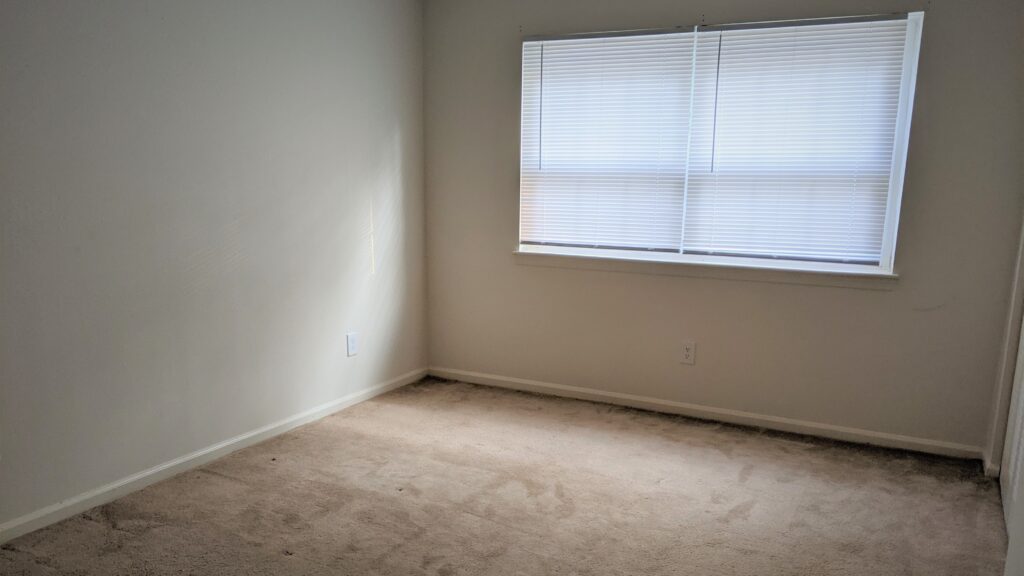
At the time, I was living in a two-bedroom apartment by myself. (I miss having rent that low!) The second bedroom was the perfect opportunity to create a home dance studio!
As you can see, it’s all carpet. It looks dark and dingy at the far edge, but that’s because the image was brightened due to poor lighting. I promise it was clean!
Materials and Space
My finished dance floor was 8′ x 12′. Make sure to measure your space carefully and adjust accordingly!
Another important note about space: when you’re building a dance floor on carpet, remember that the dance floor will be slightly raised. That means you’ll need to leave room for the door to open. Don’t plan on covering the entire carpet with your dance floor.
Required Materials:
- 3/4″ thick particle board – ten cuts of 2′ x 4′
- 5mm thick underlayment plywood
- Two cuts of 4′ x 6′
- Four cuts of 2′ x 5′
- Four cuts of 1′ x 2′ (see below for why I did all these different cuts)
- Heavy duty duct tape
- Marley panels (I used Harlequin Dance Mats)
- Marley tape (Mine came with the Harlequin mats) / gaffer’s tape or duct tape would work as well
- Cubby shelf
- Ballet barre
- Lamp
- I also bought curtains and a curtain rod, but that’s definitely not required for a dance practice space.
Price
Setting up this home dance studio was not cheap. I was willing to make an investment in these materials, because I knew I would have a use for them even when I moved out of the apartment. The wood could have any number of uses, and I know I’ll find a place for the marley either in my home or my dance studio when I “settle down.”
Prices have changed since I made this dance floor – with the lumber shortage for instance – so it’s not realistic to give exact prices of each item. I’ll give ballpark estimates, though.
All in all, the floor cost about $450. The other items came to about $250. So in total, it was a $700 project.
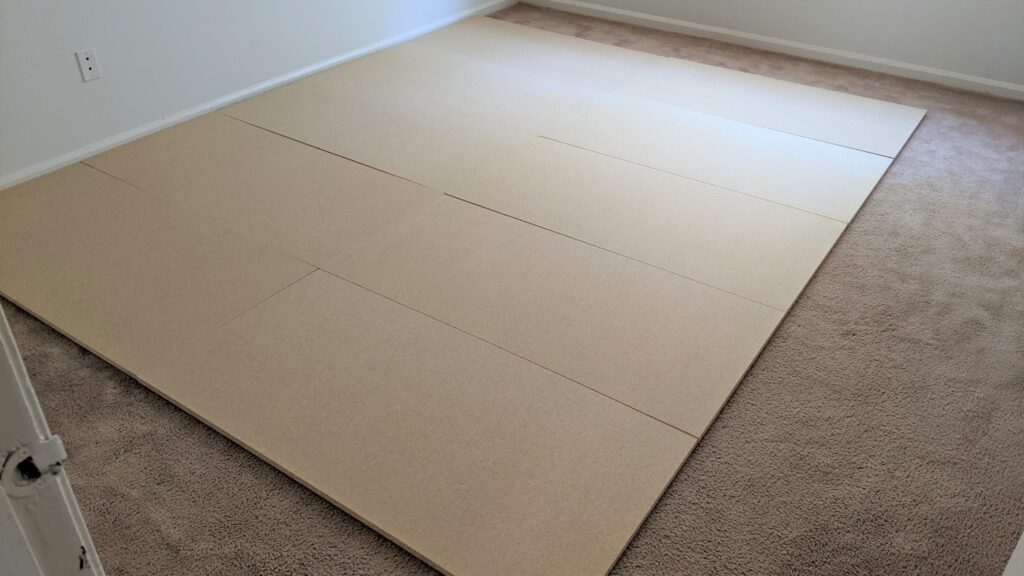
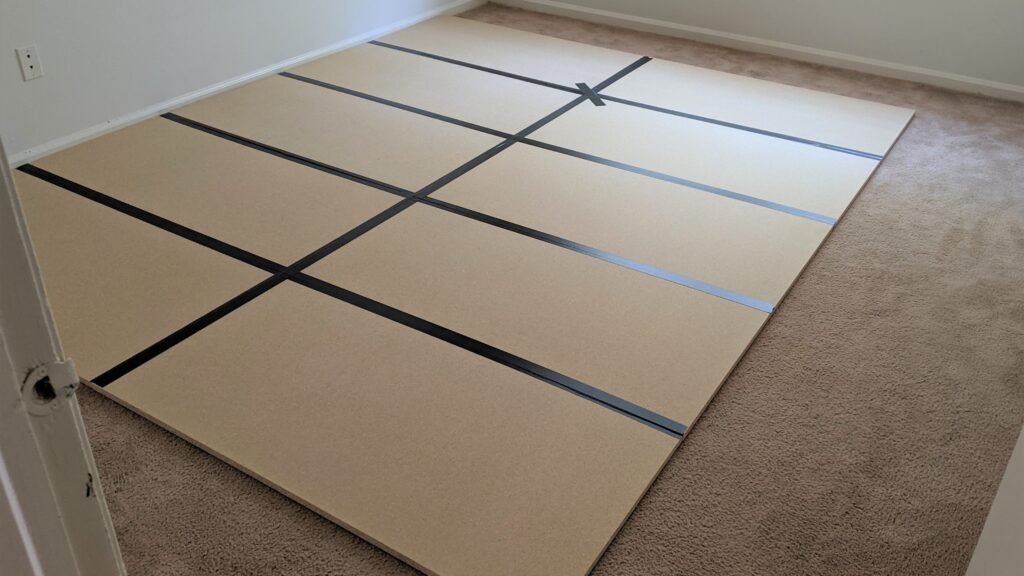
Dance Floor on Carpet Step 1: 3/4″ Particle Board
Wood tends to come in 4′ x 8′ boards at the hardware store. If your car is big enough to transport 4′ x 8′ boards, you don’t need to cut them this small. I had each of the boards cut in half so that they would fit in my car.
Laid out and lined up nicely, they form the base for my dance floor on carpet.
Secure with Duct Tape
The next step is to place heavy duty duct tape along all of the seams.
It’s okay if the boards aren’t sitting completely level at this point. Notice how I put an extra piece of duct tape over one of the intersections. That’s because the corner of one of the boards was poking up, and it needed a little help staying in place.
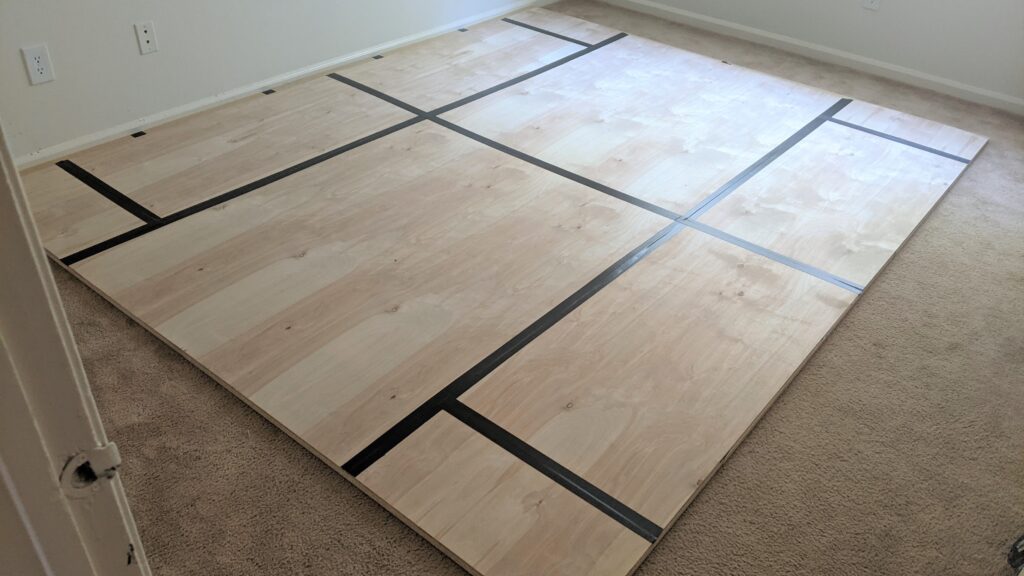
Dance Floor on Carpet Step 2: 5mm Underlayment Plywood
Next, lay your thinner boards on top of the thick ones. Secure with duct tape as before.
Why are they cut to so many different sizes? I wanted to make sure that none of the seams lined up with the layer below. This helped the dance floor stay flat!
I did not tape along the sides of the dance floor to hold the two layers in place. In hindsight, this might have been a good idea, as the top layer did slide a bit over time.
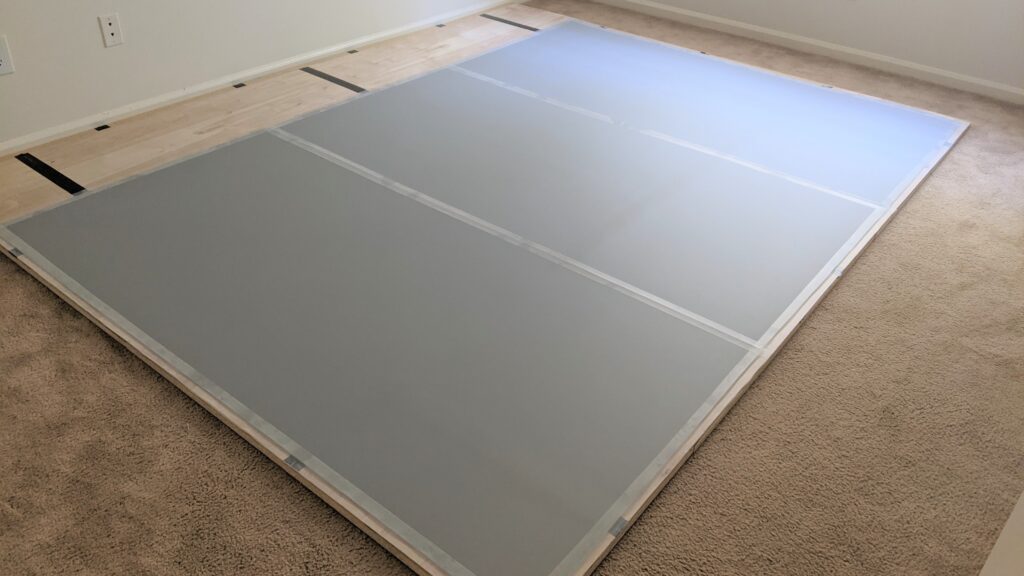
Dance Floor on Carpet Step 3: Marley Panels
Here are my three Harlequin Dance Mats (face down to hide the logo so it’s nice and neat). I also purchased their clear marley tape to hold it down. Regular gaffer’s tape or duct tape would do just fine. I just didn’t want stark lines on my floor!
Notice that the marley doesn’t completely cover the wood. I expected that and was okay with that for two reasons:
- I planned to put a barre where the wood is exposed, so I knew I wouldn’t be dancing in that area much anyway.
- I didn’t want to cut up a marley mat, and there wasn’t going to be a way to cover the whole thing without doing so.
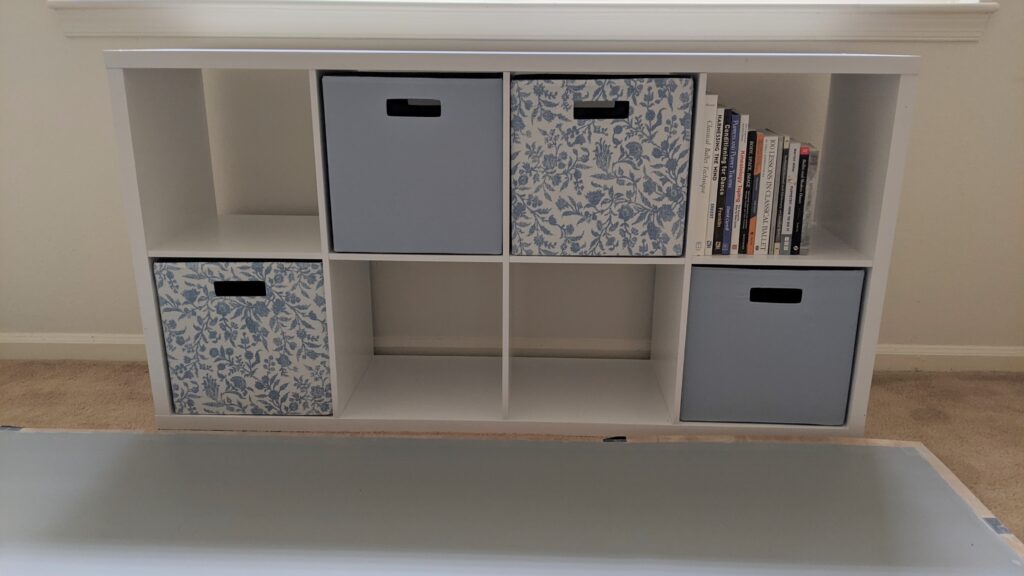
Dance Floor on Carpet Step 4: Furniture and Accessories
The room is perfectly functional as a home dance studio by the end of step 3, but these little extras make the space really nice!
Cubby Shelf
I got the shelf unit and the cube drawers from Target.
Barre
Here is the exact barre I purchased!
The main negative reviews cite its wobbliness, but that’s to be expected with even the sturdiest portable barres. I wouldn’t call this barre exceptionally wobbly. It would only be a problem if you were really relying on it for balance.
I enjoy this barre and highly recommend it! The wood feels amazing in your hands, and it’s easy to adjust.

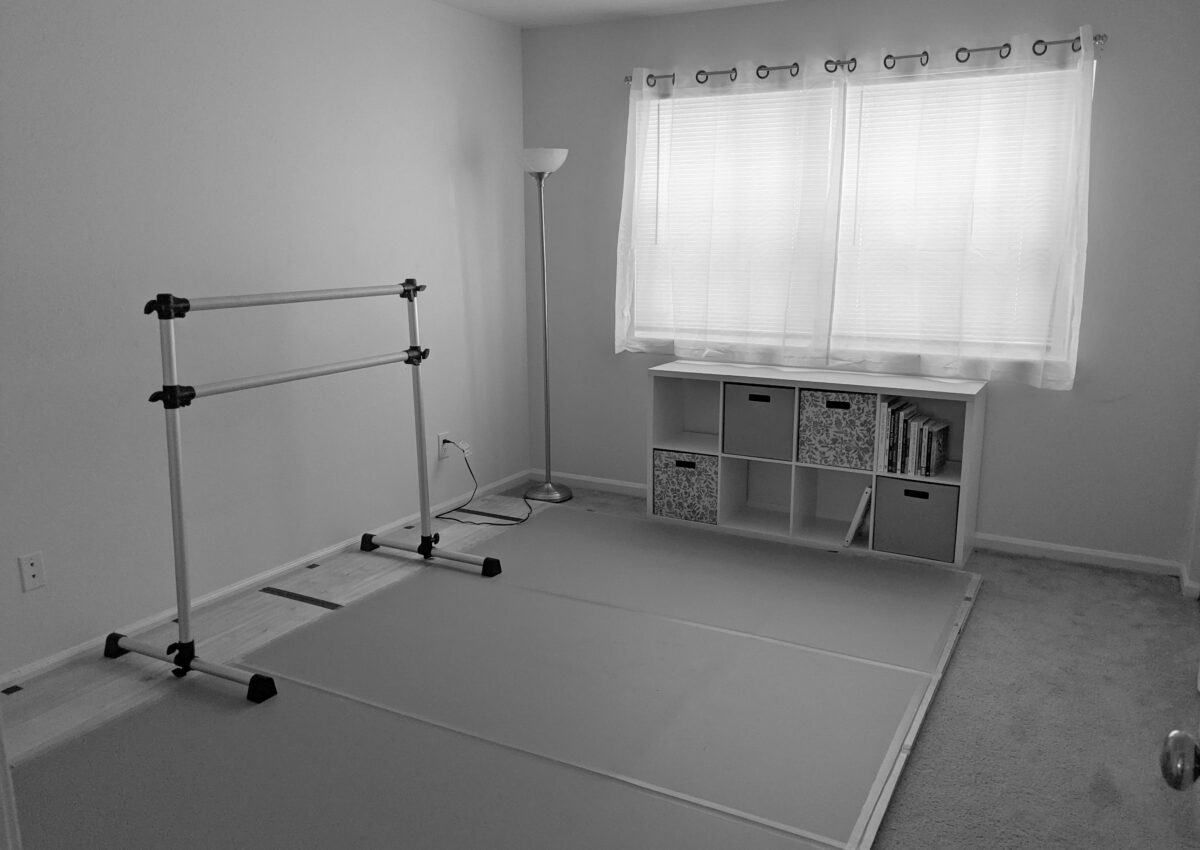
After: My Own Home Dance Studio!
*Happy sigh*
I miss this space. By the time I got around to writing this post, I had already moved out of this apartment. My new place doesn’t have room for this big a setup, so I have to make do with less space.
But I can say with confidence that this setup lasts! I got a year of excellent use out of it, from virtual classes to self-tape auditions to working on choreography.
The only issue I had was what I mentioned earlier about the top layer sliding. Once or twice I had to scootch the thin boards an inch or so to line them back up with the bottom layer. There was also a minor case of warping with the thin boards, causing a little bump in the marley, but it never affected my dancing.
If you follow this tutorial and make a home dance studio of your own, I’d love to see it! Post a picture and tag @danceinsightblog on Instagram. Our DMs are always open for questions, too!